How to Make a Drone Project: A Step-by-Step Guide
Hey there! If you’re looking to dive into the exciting world of drones, you’ve come to the right place. Building your own drone can be a fun and educational experience. Whether you’re a student, a tech enthusiast, or just someone curious about how things work, making a drone is a great project. So, let’s get started, shall we?
1. Define Your Purpose
First things first, think about what you want your drone to do. Are you planning to use it for photography, racing, or maybe just for fun? Knowing the purpose will help you decide on the design and components you’ll need.
2. Gather Essential Components
Here’s a list of the basic parts you’ll need:
- Frame:This is the body of your drone. You can buy a ready-made frame or even make one from materials like carbon fiber or wood.
- Motors: Brushless motors are the best choice for drones. Depending on your design, you might need four for a quadcopter.
- Electronic Speed Controllers (ESC): These are crucial as they control the speed of your motors.
- Flight Controller: This is like the brain of your drone; it keeps everything stable and in control.
- Propellers: Choose the right size based on your drone’s specifications.
- Battery: Lithium Polymer (LiPo) batteries are popular because they pack a lot of power.
- Transmitter and Receiver: These help you control your drone from a distance.
- Camera (optional): If you’re aiming for aerial photography, a camera will be essential.
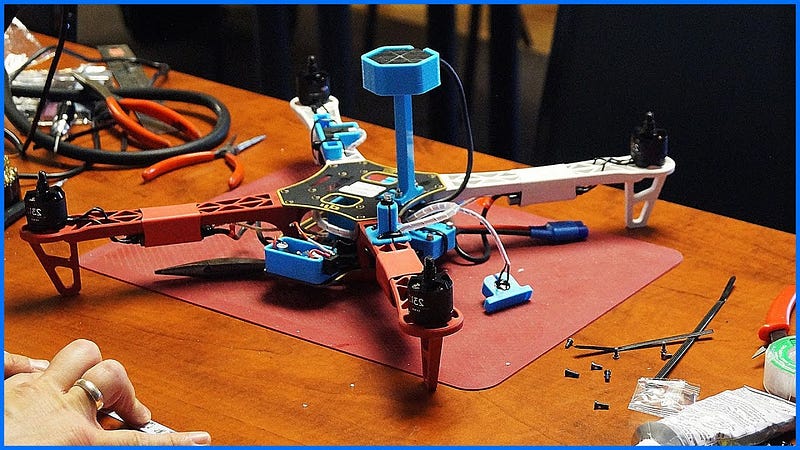
3. Assemble the Frame
Now, let’s get to the fun part — assembling the frame! If you have a pre-made frame, just follow the instructions that come with it. Make sure everything fits snugly and there’s enough space for your electronics.
4. Install Motors and Propellers
Next, attach the motors to the frame. Ensure they’re securely mounted. After that, put on the propellers. Make sure they’re in the right direction so your drone can lift off properly.
5. Connect the Electronic Components
- Install the ESCs: Connect each motor to its ESC. These will get signals from the flight controller to manage the motor speed.
- Connect the Flight Controller: Follow the wiring diagram that comes with your flight controller. Connect the ESCs and any additional sensors you might have.
- Setup the Receiver: Link the receiver to the flight controller, making sure it’s paired with your transmitter.
6. Power Up and Configure
Once everything is hooked up, it’s time to power up your drone! Use the software provided with your flight controller to set up things like flight modes and calibrate it for stability. This is super important for a smooth flying experience.
7. Conduct Pre-Flight Checks
Before you take off, do a thorough check:
- Make sure all connections are tight.
- Check the battery voltage.
- Ensure the propellers are secure.
- Verify that the flight controller is calibrated.
8. Test Flight
Find a nice open space for your first flight. Start with short, low flights to test how stable your drone is. As you get comfortable, you can gradually increase the height and duration of your flights.
9. Troubleshoot and Improve
After your test flights, note down any issues you faced or areas where your drone could improve. Tweak the settings in the flight controller software or make physical adjustments as needed. Don’t hesitate to ask for help from online forums or fellow drone enthusiasts!
10. Explore Advanced Features
Once you’re confident with flying, think about adding some advanced features:
- GPS Navigation: This will help with autonomous flying and setting waypoints.
- Camera Integration: Perfect for capturing stunning aerial shots or FPV flying.
- Obstacle Avoidance Sensors: These can enhance safety and prevent crashes.
Conclusion
Building a drone project is not just about flying; it’s about learning and having fun! By following this guide, you can create a drone that’s tailored to your needs. Remember, practice makes perfect, so don’t be afraid to experiment and learn from each flight. Happy flying, and enjoy your drone journey!

Comments
Post a Comment